Misfires in bolt action rifles can happen for many reasons. Having a working knowledge of how a bolt assembly functions and how ammunition must match the tolerances of the chamber are essential for gunsmith’s.

I use the K.I.S.S. method for diagnosing mechanical problems. If you have never heard of that, it stands for “Keep It Simple Stupid”. More formally it is a variation on “occam’s razor” (attributed to William of Occam), simply stated, the simplest answer is usually the correct answer.
As we learn more and build proficiency with a subject, it’s tempting to use advanced knowledge to jump ahead in fixing problems. This is usually a waste of time and resources because most issues are simple/basic problems that are easily fixed. So, always start with the most likely thing first.
I often see people on forums offer well meaning advice. Unfortunately, they often skip the easy things to check and go straight to more complicated and expensive fixes. In the case of misfires a guy asked about this problem with an original military issue, Mauser 98. He said, “It feeds standard ammo and locks up fine. And then said he had, “ordered a new firing pin spring.”
He included a picture of the firing pin assembly removed from the bolt. At least he had some idea about just checking his bolt in the action without the spring tension of the firing pin and bolt sleeve lock spring interfering with the feel. This is where I decided it was time to write about this type of diagnosis as the advice received while mostly valid was making the diagnosis much more complicated than is necessary.
All bolt actions have very similar designs, because they all perform the same functions. This makes it easy to have a list of tests or observations that can resolve the issue in short order. Observation of details is your friend, while I have a list of things I look for, many of the items are checked at the same time. If you have all the items listed in your thought process you will likely spot the problem immediately. There can be more than one problem.
- Examine the ammo that misfired.
- Double check that the ammo is the correct caliber/cartridge for the chamber.
- Reloads or Factory ammo? (Reloads should always be treated as suspect). If possible, test with Factory ammo.
- Are the primers seated properly? (Primers not fully seated can cause misfires).
- Look at the primer to see what the firing pin strike looks like. (see section of protrusion)
- Debris in the bolt or firing pin assembly
- Disassemble and clean
- Check the headspace of the rifle with proper gauges.
- Correct headspace in the firearm means the problem is elsewhere. There are literally entire books on headspace, make sure you understand proper measurements.
- Excessive headspace can cause misfires (over .010” excessive headspace is probably required to cause misfires).
- Check Firing pin protrusion in the fired position.
- Ideal protrusion is between .060” and .065”
- Less than .060” can cause weak strikes or misfires
- More than .065” can lead to pierced primers and broken firing pins
- Consider operator error. Many shooters do not know their firearm as well as they should.
- At this point, in 98% of all cases you will have resolved the issue.That last 2% of situations is where you will utilize more advanced gunsmith skills.
- Firing pin
- Condition
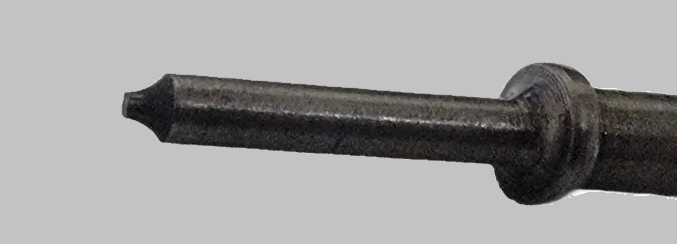
- Shape of firing pin nose (should be a radius)
- Firing pin spring (actually fairly rare as a problem)
- Lubrication.
- Cocking Piece
- Condition
- Fit properly (allowing the firing pin to function as designed)
- Look for interference from stock or action touching incorrectly.
- Bolt body and cocking cams
- Condition
- Damage to the cams may indicate something is not fit correctly
- Clean interior of the bolt (no debris)
- Gas Shroud (bolt sleeve)
- Condition
- Clean no debris
- No interference with the cocking piece, stock, or action.
- Trigger to Cocking piece relationship
- Damage to the cocking piece or sear might allow the cocking piece to engage incorrectly (too short a firing pin fall)
- Lack of clearance with sear causes cocking piece to drag or ride down, reducing power of firing pin strike
- Firing pin
I probably have missed something in this list. Keep in mind, I am generalizing for bolt actions and am not talking about any single model. When you do general repair you have to learn to adapt what you know to the guns that come to your workbench. There are nearly unlimited variations out there and you cannot possibly have experience with all of them. Be observant, and use your knowledge of mechanical systems to diagnose problems.

